Introducing the new CLion Conan Plugin compatible with 2.X


In this post, we are thrilled to announce the launch of the new version of the Conan CLion Plugin, now compatible with the 2.X versions of Conan. The new plugin is designed to bring more ease and control to developers using CLion (with version higher than 2022.3) and Conan for C++ projects. We will walk you through the process of using this plugin with a practical example that uses libcurl and stb to download an image from the Internet, load it, and print it as ASCII art in the console.
How the plugin works
Before explaining how to install, configure, and use the plugin, let’s briefly discuss how
it integrates Conan with CMake to create a seamless experience. This plugin utilizes
cmake-conan, a CMake dependency
provider
for the Conan C and C++ package manager. It injects conan_provider.cmake using the
CMAKE_PROJECT_TOP_LEVEL_INCLUDES definition. This dependency provider will translate
the CMake configuration to Conan. For instance, if you select a Debug profile in CLion,
Conan will install and use the packages for Debug.
Bear in mind that cmake-conan activates the Conan integration every time CMake calls to
find_package(), meaning that no library will be installed until the CMake configure
step runs. At that point, Conan will try to install the required libraries and build them
if needed.
Also, note that as dependency providers are a relatively new feature in CMake, you will need CMake version >= 3.24 and Conan >= 2.0.5.
Installing the plugin
To install the new Conan CLion plugin, navigate to the JetBrains marketplace. Open CLion, go to Settings > Plugins, then select the Marketplace tab. Search for the Conan plugin and click on the Install button. After restarting CLion, a new “Conan” tool tab will appear at the bottom of the IDE.
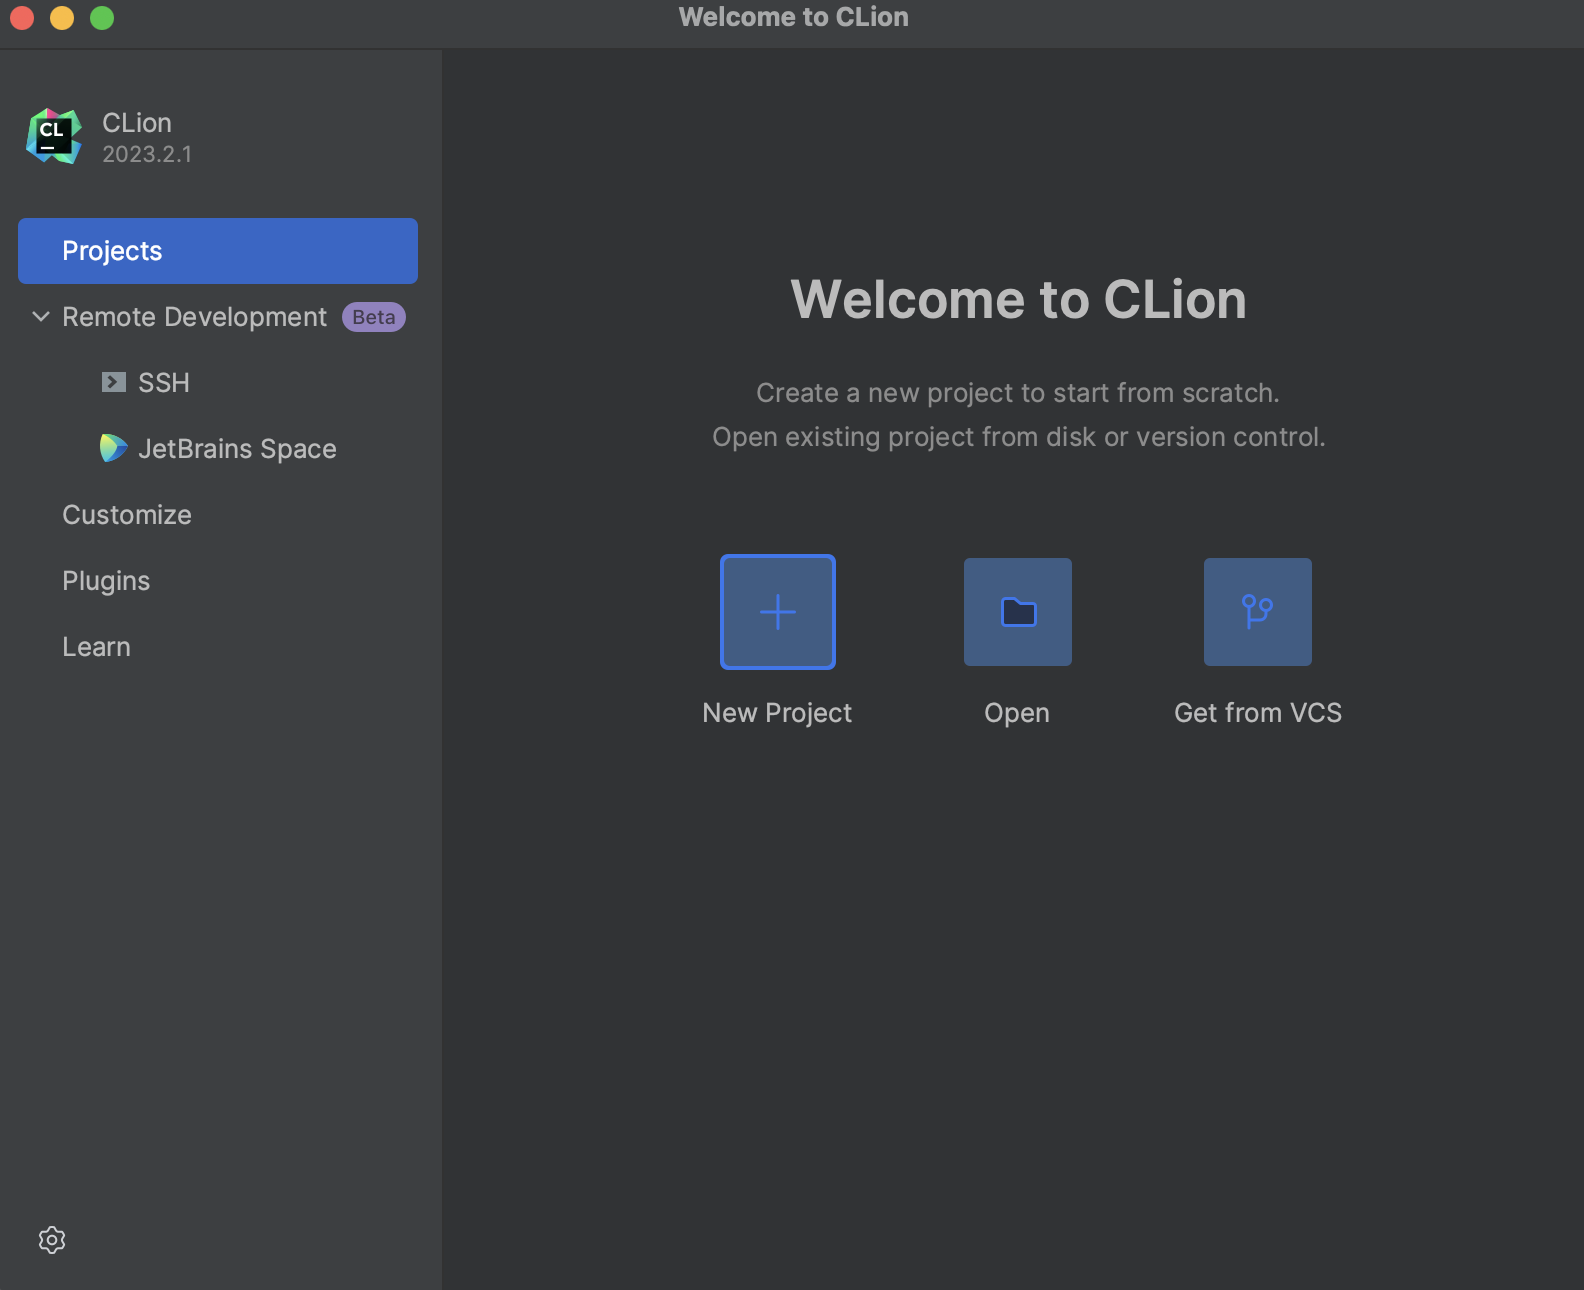
Creating a new CMake project
First, create a new CMake project in CLion, as usual.
Then select the project location and the language standard you want to use, and click on “Create”.
Configuring the plugin
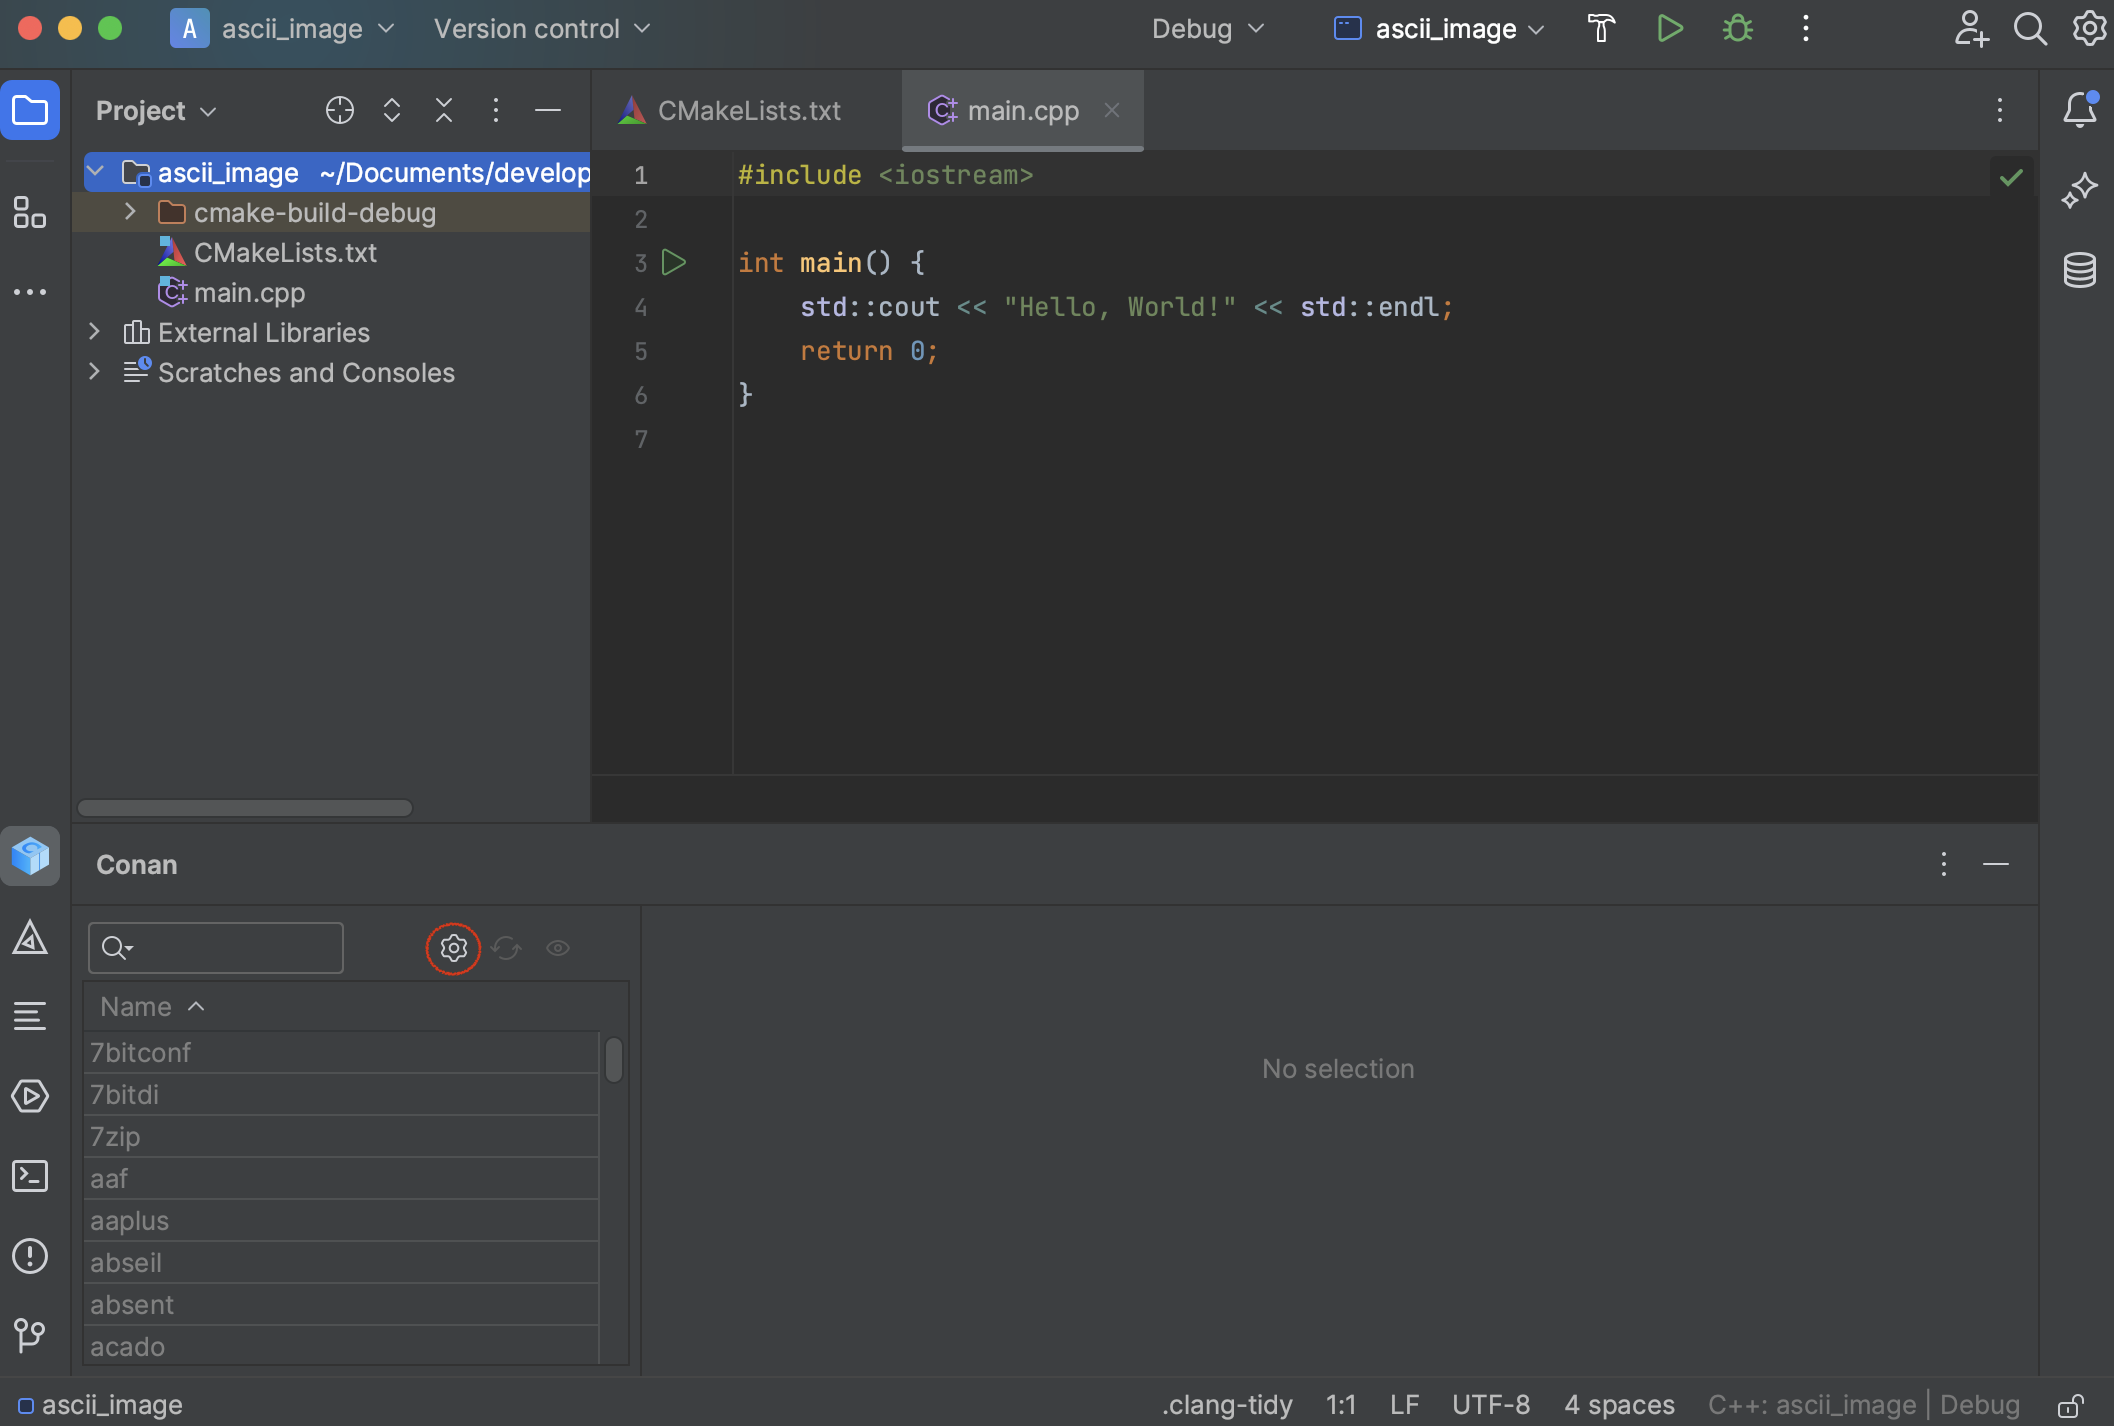
Go to the “Conan” tool tab at the bottom of the IDE. You will see that the only enabled action in the toolbar of the plugin is the one with the ⚙️ (wheel) symbol, click on it.
The first thing you should do there is configuring the Conan client executable that’s going to be used. You can point to one specifically installed in an arbitrary location on your system or you can select “Use Conan installed in the system” to use the one installed at the system level.
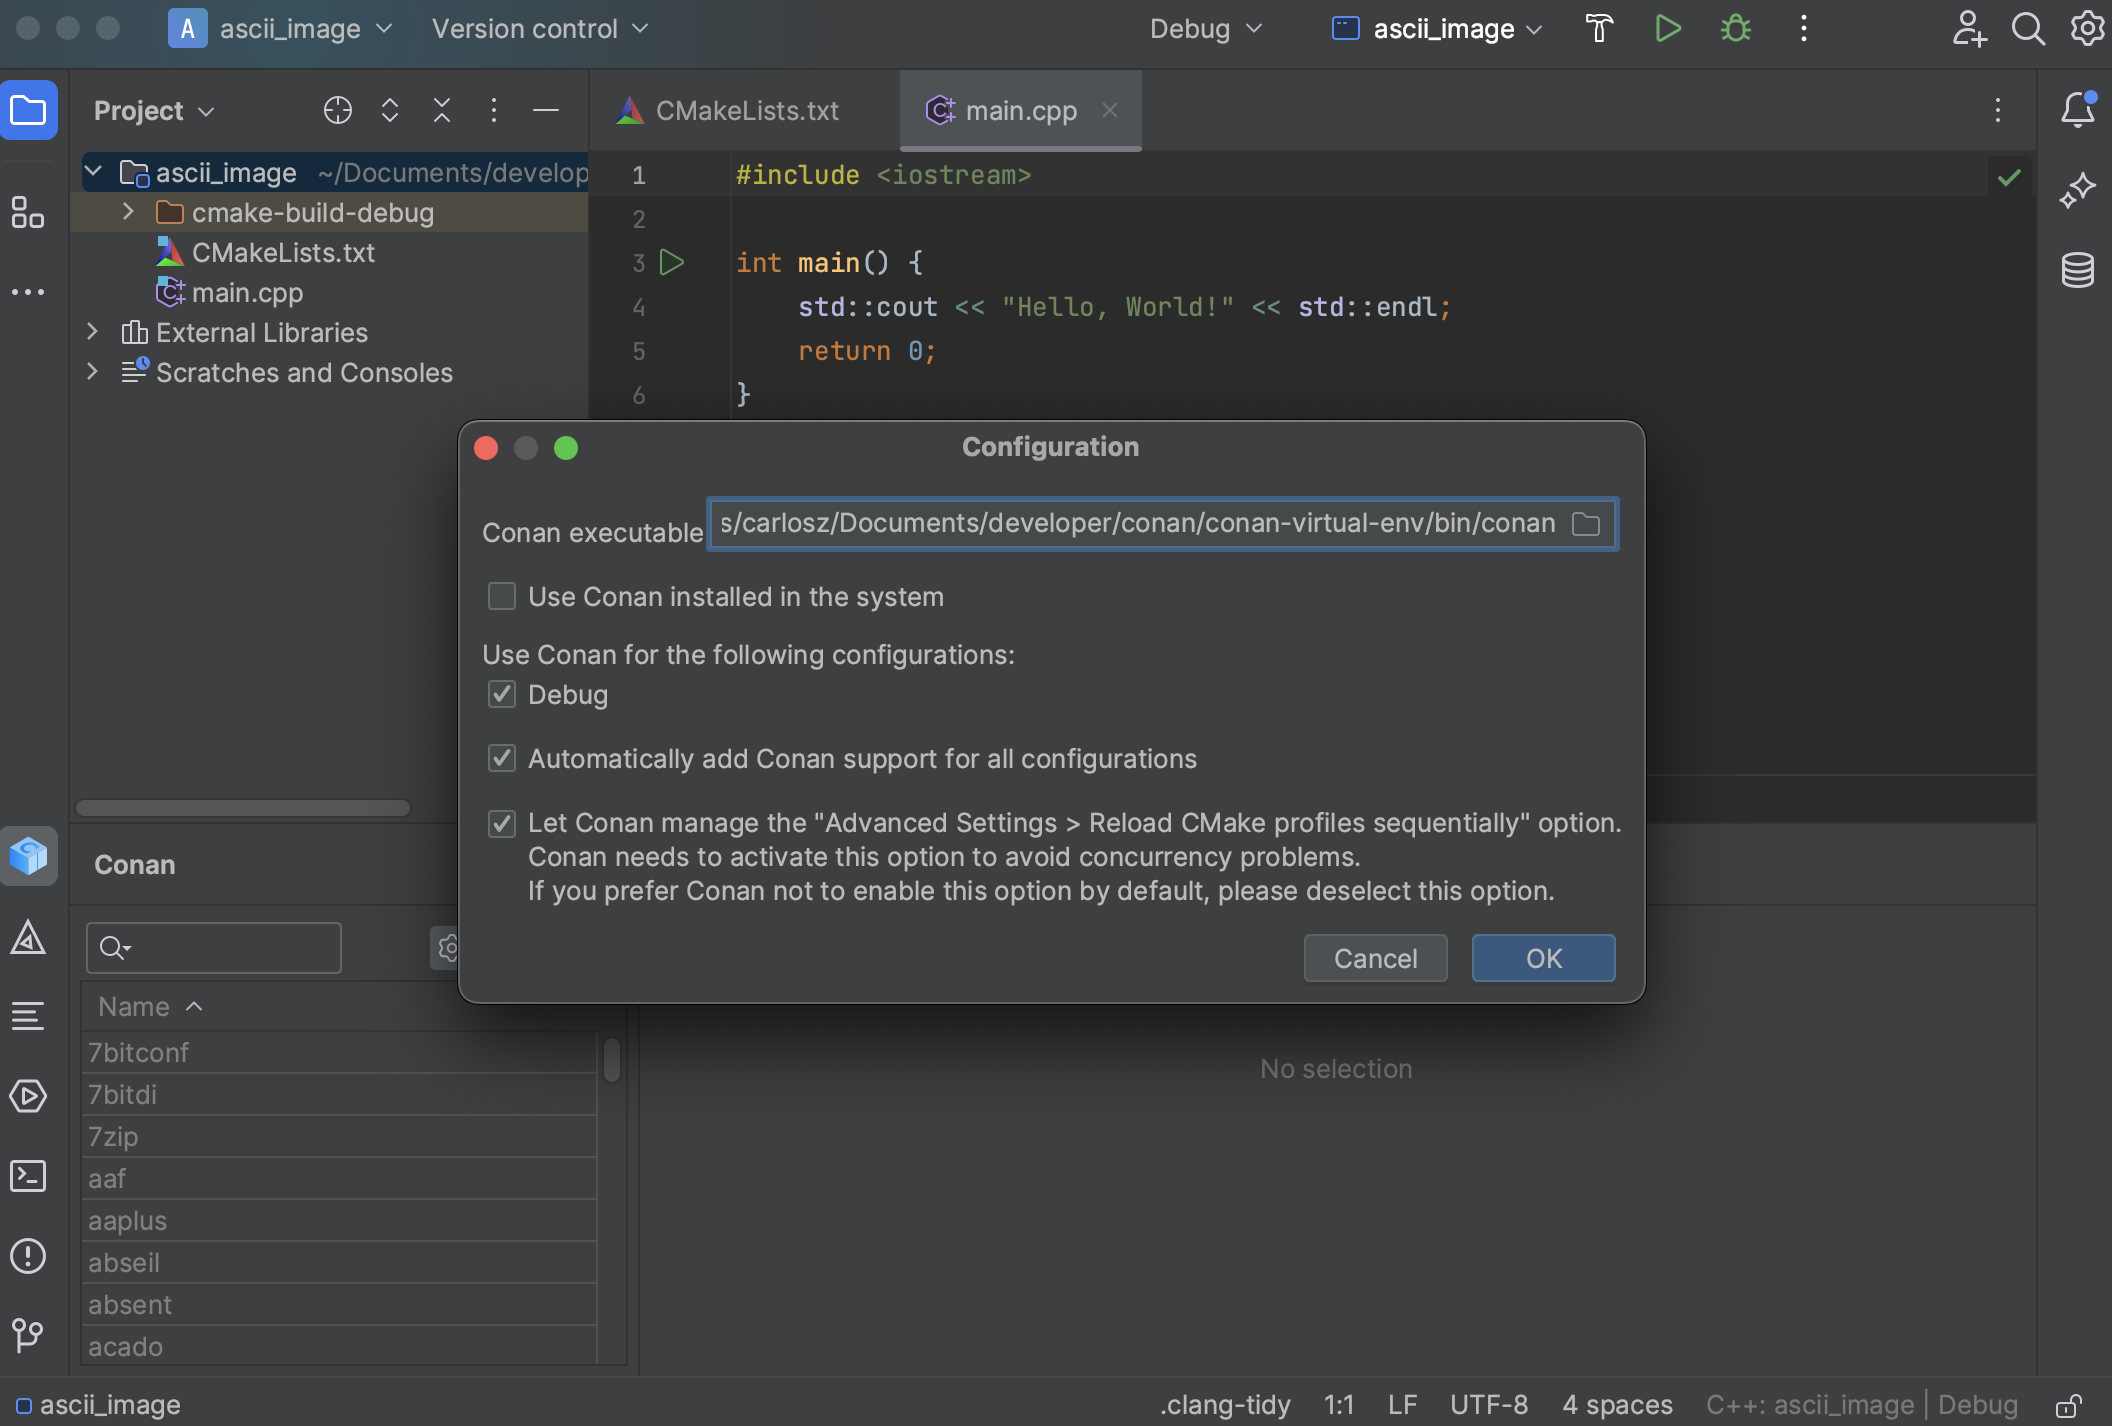
You will find there some options marked as default. Let’s go through all of them.
-
First, you will see checkboxes to mark in which configurations Conan should manage the dependencies. In our case, as we only have the Debug configuration, it’s the only one checked. Also, below that “Automatically add Conan support for all configurations” is marked by default. That means that you don’t have to worry about adding Conan support to new build configurations because the plugin will automatically add Conan support by default.
-
You can also see that there’s a checkbox to let Conan change the default CLion settings and run CMake sequentially instead of running it in parallel. This is needed as the Conan cache is not yet concurrent up to Conan 2.0.9 version.
Normally, if you are using the Conan plugin, you wouldn’t want to unmark them. So leave them and let’s create our project and add the libraries to it. So, click on the OK button and the plugin should be ready to use.
Note: At this point, CLion will run the configure step for CMake automatically. Since
the plugin sets up the conan.cmake dependency provider, a warning will appear in the
CMake output indicating that we have not added a find_package() to our CMakeLists.txt
yet. This warning will disappear after we add the necessary find_package() calls to the
CMakeLists.txt file.
After doing the initial configuration, you will notice that the list of libraries is now enabled and that the 🔄 (update) and 👁️ (inspect) symbols are also enabled. We will explain them later in detail.
Using the plugin
Now that we have our plugin configured and ready, let’s explore its usage with an example. For this, we will use libcurl to download an image from the Internet, then stb to load it, and some basic code to print it in the console as ASCII characters.
We will not delve into the specific details of the code, as it is beyond the scope of this tutorial. However, all the source code for this example is available in the Conan 2.0 examples repo:
Adding the code
First, open the main.cpp file that CLion generated and replace the example code with the code below (you can also copy it from the repository):
#include <iostream>
#include <curl/curl.h>
#include <vector>
#include <string>

#define STB_IMAGE_IMPLEMENTATION
#include <stb_image.h>

// Size of ASCII art
static const int new_width = 100;

// Ascii gradient
static const std::string ASCII_CHARS = " .:-=+#%@@"; // Inverted colors

// Function to scale the luminance into an ASCII character
char map_luminance_to_ascii(float luminance) {
    size_t position = luminance * (ASCII_CHARS.size() - 1);
    return ASCII_CHARS[position];
}

// Function to download image
static size_t write_data(void* ptr, size_t size, size_t nmemb, void* stream) {
    ((std::string*)stream)->append((char*)ptr, size * nmemb);
    return size * nmemb;
}

std::string download_image(const std::string& url) {
    CURL* curl = curl_easy_init();
    std::string response_string;

    curl_easy_setopt(curl, CURLOPT_URL, url.c_str());
    curl_easy_setopt(curl, CURLOPT_WRITEFUNCTION, write_data);
    curl_easy_setopt(curl, CURLOPT_WRITEDATA, &response_string);
    curl_easy_perform(curl);
    curl_easy_cleanup(curl);

    return response_string;
}

// Function to convert image to ASCII
std::string image_to_ascii(const std::string& image_data) {
    int width, height, channels;
    unsigned char* data = stbi_load_from_memory(
            reinterpret_cast<const stbi_uc*>(image_data.data()),
            image_data.size(),
            &width,
            &height,
            &channels,
            0
    );

    int new_height = static_cast<int>(static_cast<double>(height) / width * new_width * 0.45);

    std::string ascii_image;
    for (int i = 0; i < new_height; ++i) {
        for (int j = 0; j < new_width; ++j) {
            int old_i = i * height / new_height;
            int old_j = j * width / new_width;

            float r = data[(old_i * width + old_j) * channels + 0] / 255.0f;
            float g = data[(old_i * width + old_j) * channels + 1] / 255.0f;
            float b = data[(old_i * width + old_j) * channels + 2] / 255.0f;
            float luminance = (0.2126f * r + 0.7152f * g + 0.0722f * b); // Subtract the luminance from 1 to invert

            ascii_image += map_luminance_to_ascii(luminance);
        }
        ascii_image += '\n';
    }

    stbi_image_free(data);
    return ascii_image;
}

int main(int argc, char** argv) {
    // Picture by Katarzyna Modrzejewska from pexels.com
    std::string url = "https://images.pexels.com/photos/1314550/pexels-photo-1314550.jpeg";

    if (argc > 1) {
        url = argv[1];
    }

    std::string image_data = download_image(url);
    std::cout << image_to_ascii(image_data);
}
Essentially, this application accepts an image URL as an argument (or defaults to a
specific one if not provided), and downloads it using libcurl with the
download_image() function. Subsequently, it reads the RGB values with stb and
converts the luminance values to ASCII characters using the image_to_ascii() function.
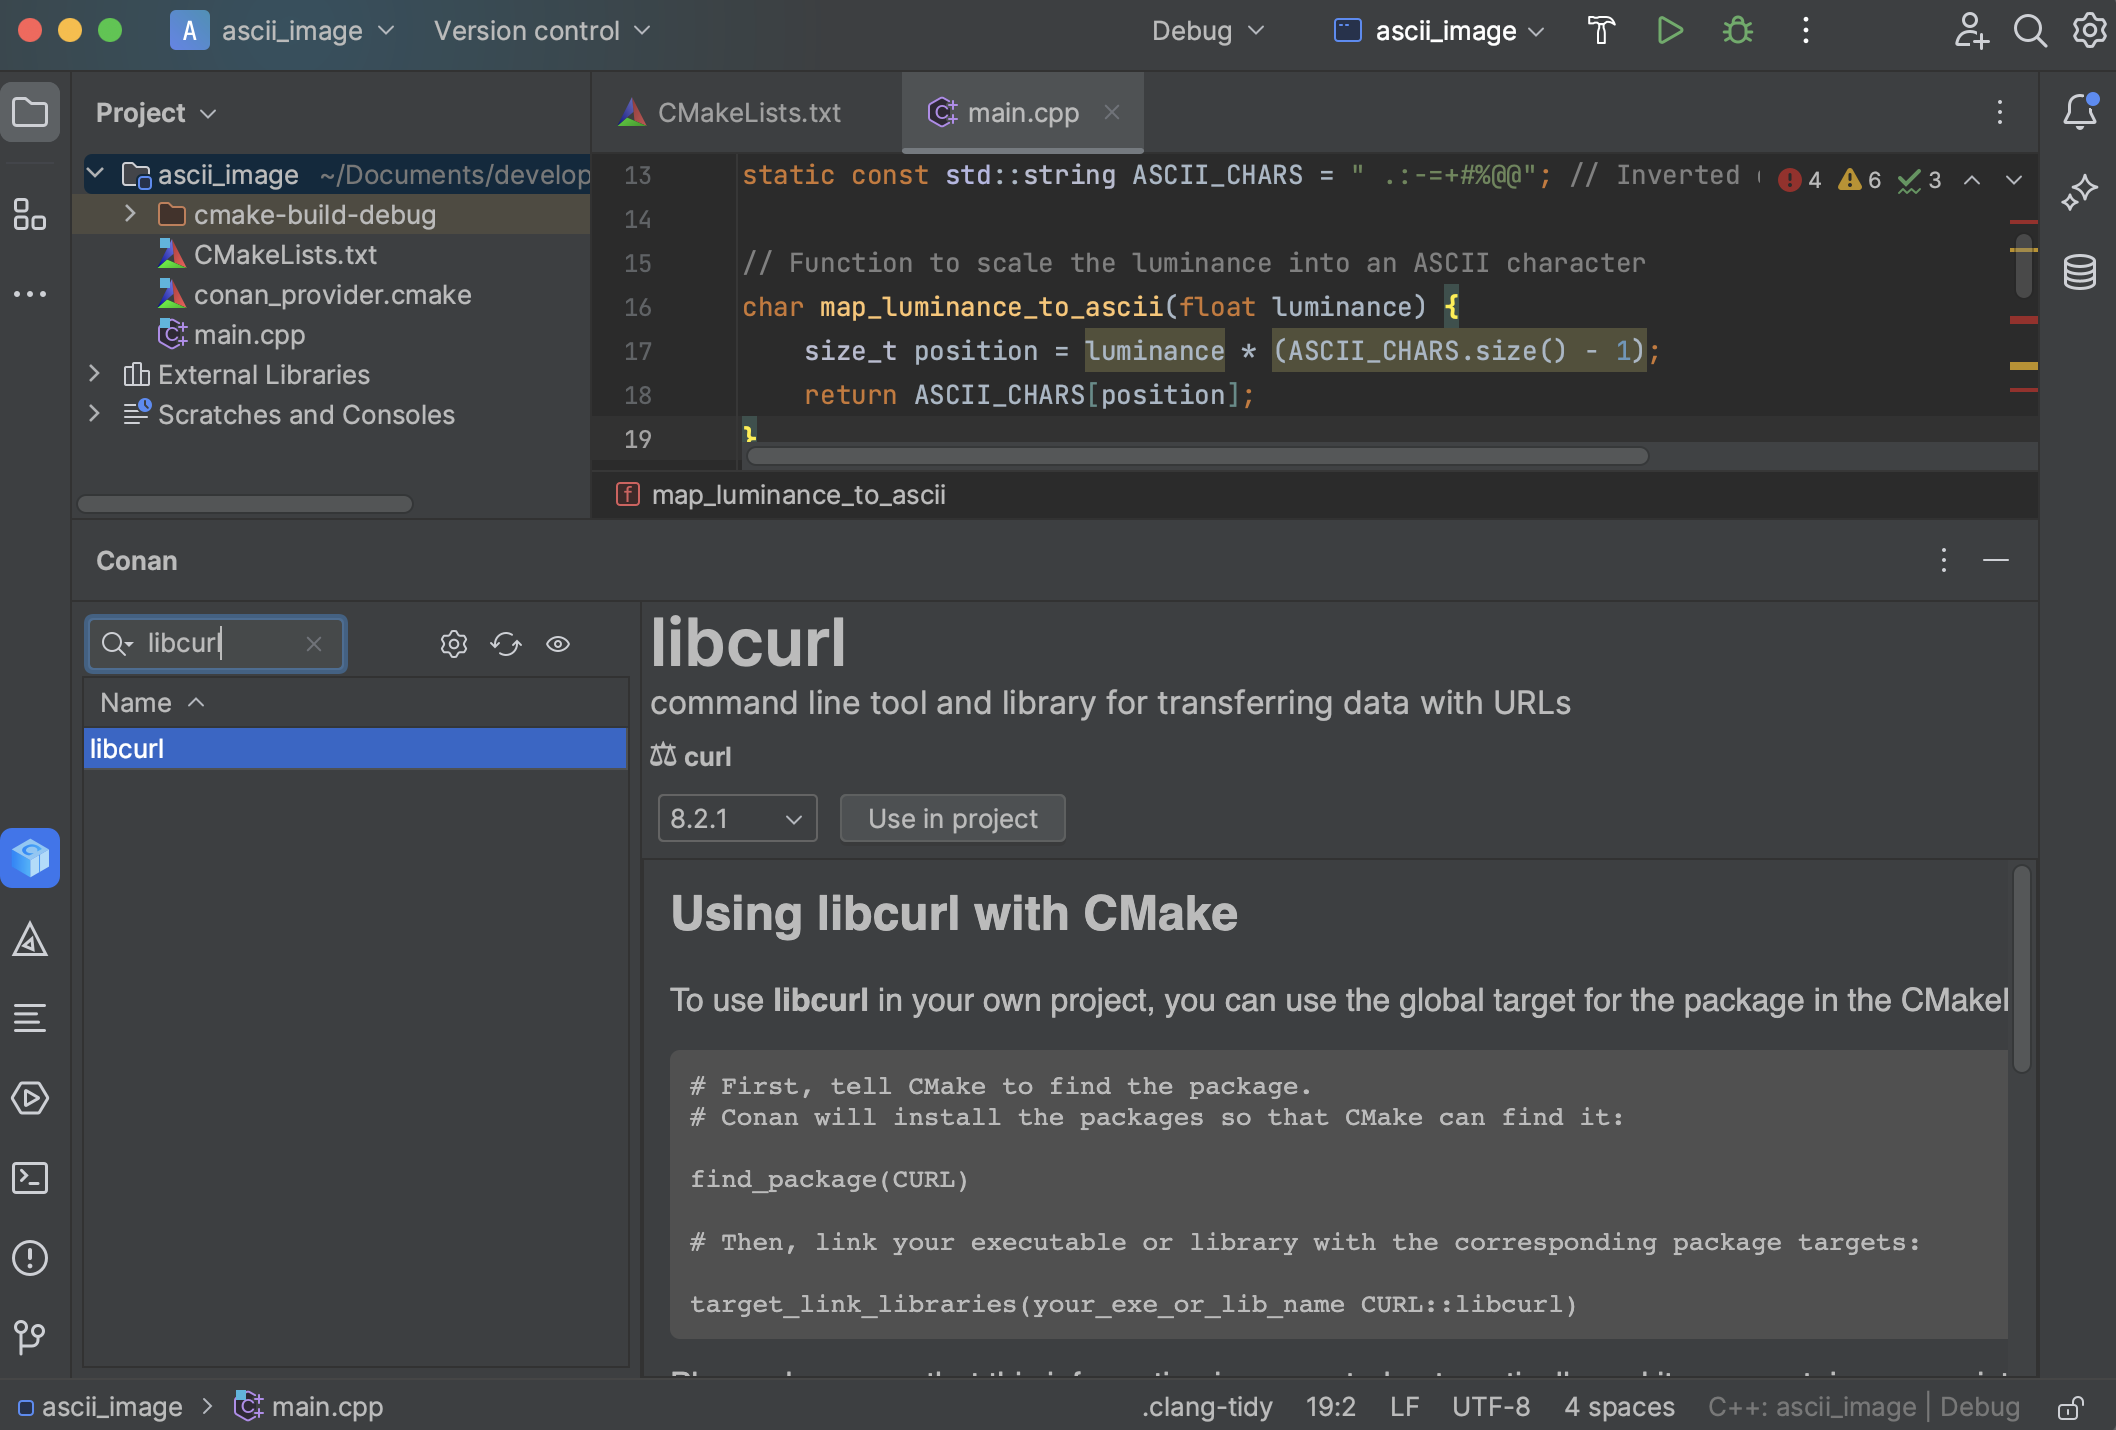
Currently, attempting to build this code will result in an error because we don’t have the required libraries yet. Navigate to the library list and search for libcurl. Some information on how to add it to CMake will be displayed, along with a “Use in project” button. Select the version you want to use and click the button.
Perform the same operation for stb.
Now, if you click on the 👁️ (inspect) icon mentioned earlier, you will see all the libraries we added to the project. This includes basic target information for CMake and the necessary code snippets to add to CMake to use them.
Conan stores information about the used packages in a conandata.yml file located in your project folder. This file is read by a conanfile.py, also created during this process. These files can be customized for advanced usage of the plugin, but please read the information in the corresponding files on how to do this properly.
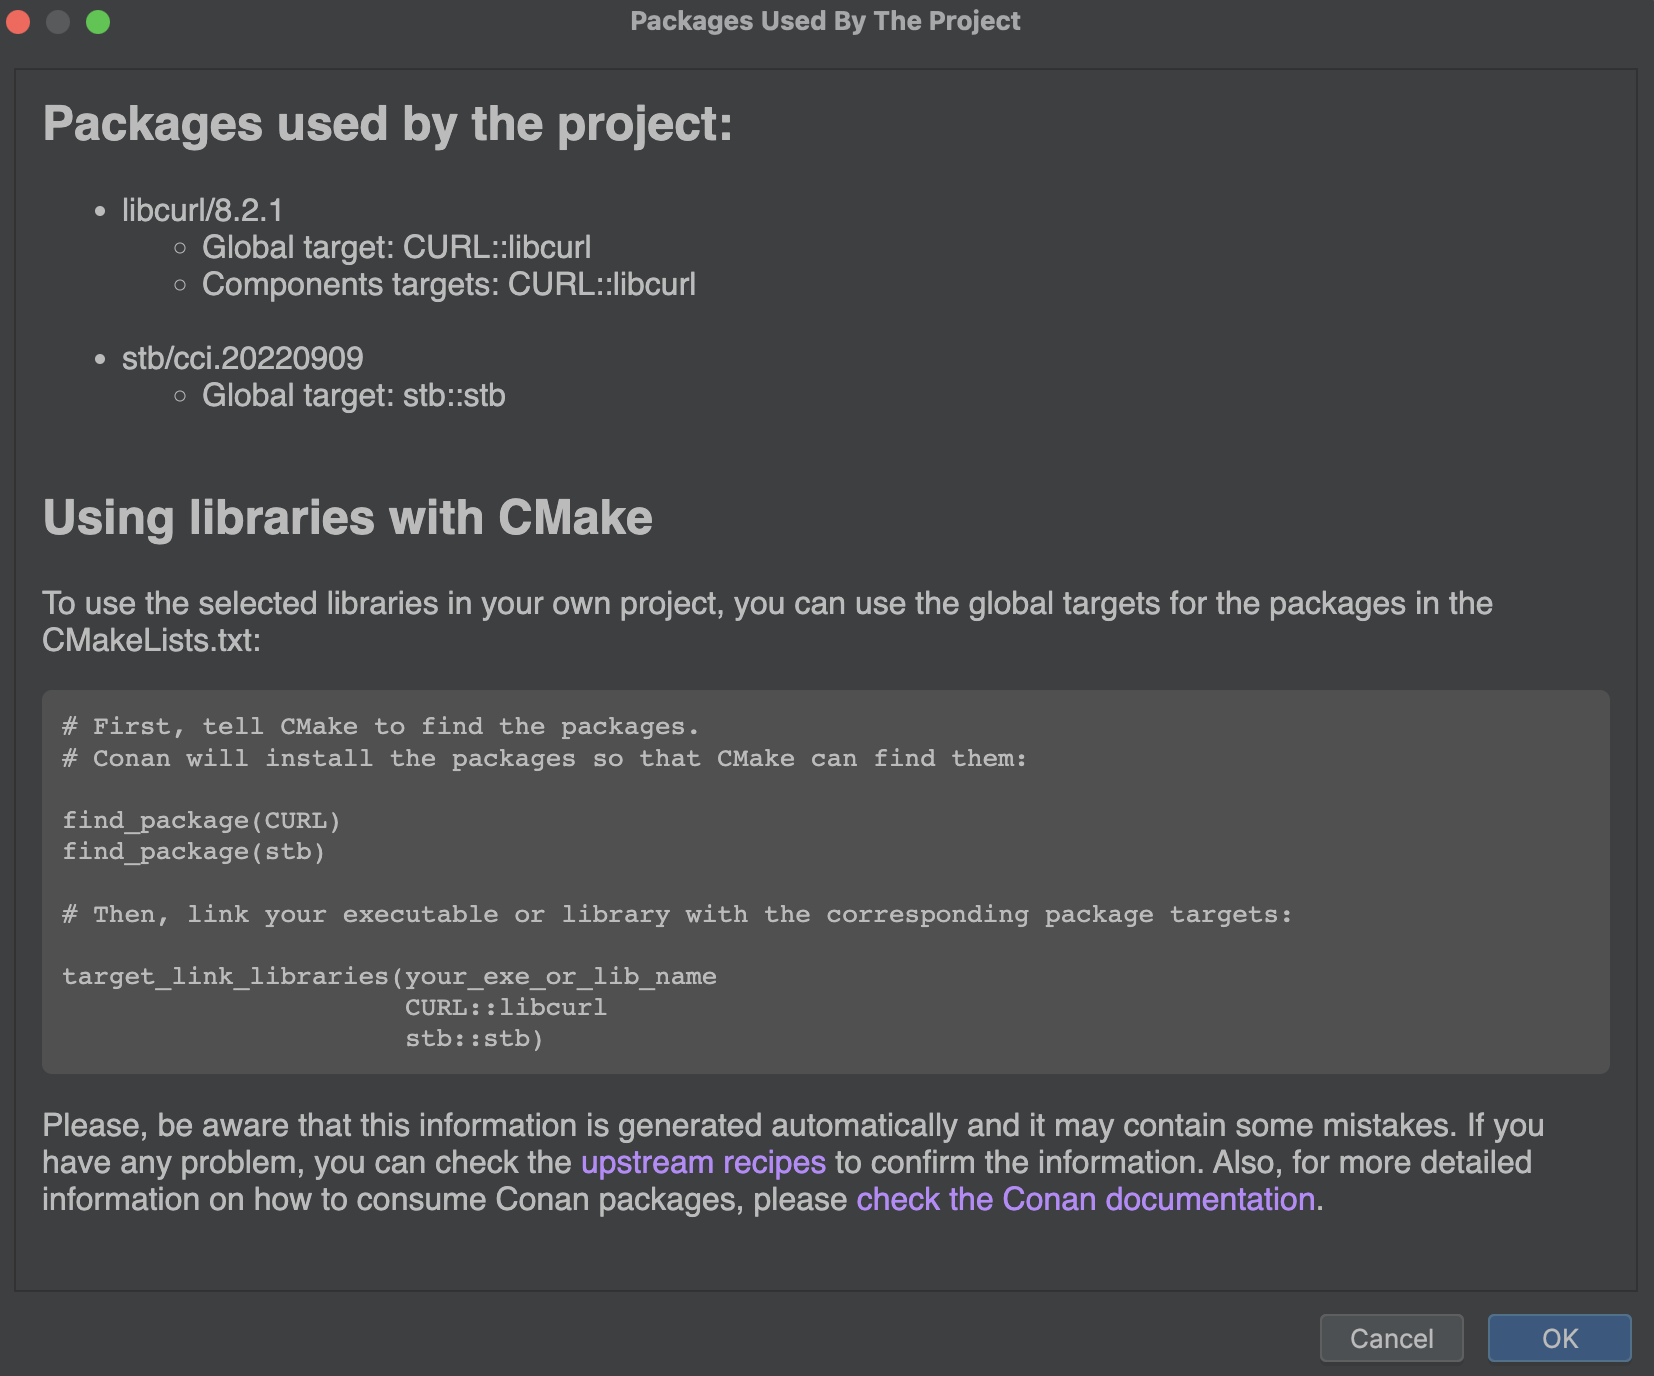
Modify your CMakeLists.txt according to the instructions, which should result in something like this:
cmake_minimum_required(VERSION 3.25)
project(ascii_image)
set(CMAKE_CXX_STANDARD 17)
find_package(CURL)
find_package(stb)
add_executable(ascii_image main.cpp)
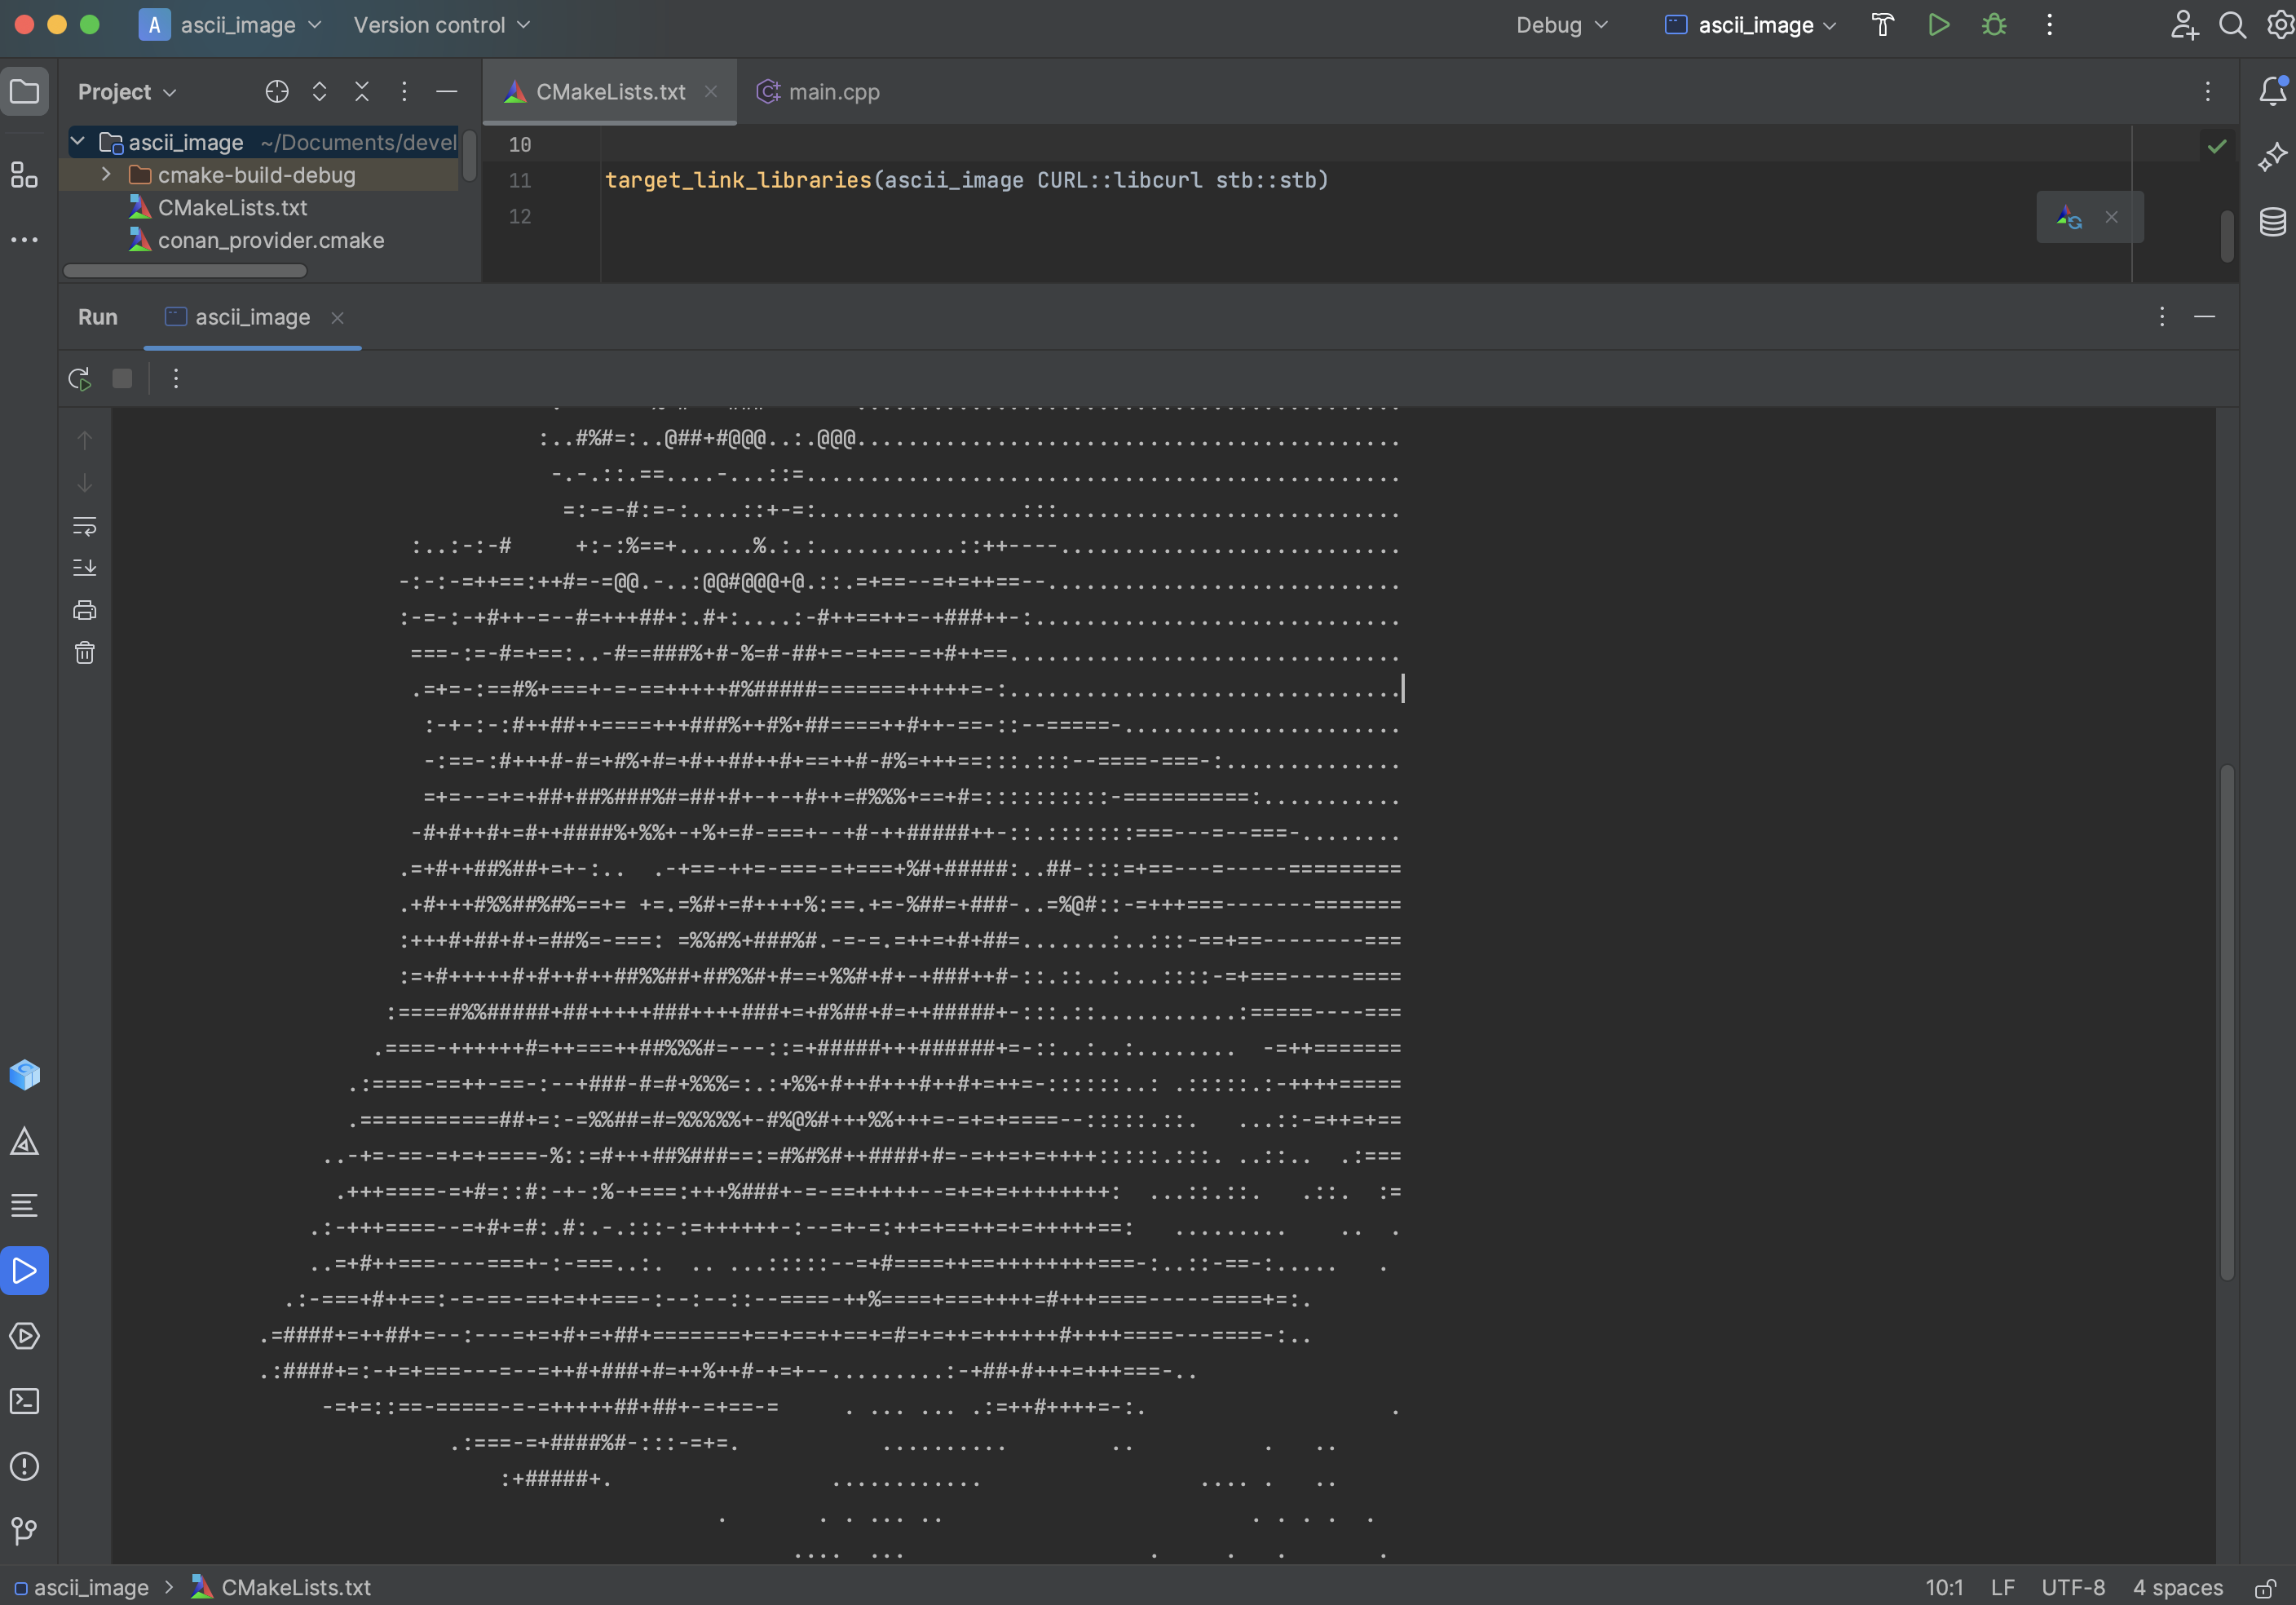
target_link_libraries(ascii_image CURL::libcurl stb::stb)
After reloading the CMake project, you should see Conan installing the libraries in the CMake output tab. Once the configuration process is complete, you can build and run the project:
Conclusions
The new Conan CLion plugin, compatible with 2.X versions, is designed to provide seamless integration between the Conan package manager and the CLion IDE. The plugin offers a more intuitive interface, making it easier to manage your dependencies directly within CLion. We hope this tool enhances your development experience, and we eagerly await to see what you will build with it!