C/C++ Binary Package Management for Visual Studio


Conan C/C++ package manager works with any build system to manage and share binaries, and to target any OS, compiler and architecture. This blog post provides a short tutorial that shows how you can use Conan to create, share and consume binary packages directly with a pure Visual Studio approach.
Microsoft has launched vcpkg, which is a package manager for Visual Studio based on CMake scripts. While it can be useful to retrieve and build the latest stable version of OSS libraries from sources, it has some limitations when used as a dependency manager for user projects. One of them is the typically large size of projects, which requires managing pre-built binaries, since building from sources is not always feasible. Another inconvenience is that installing different versions of the same package simultaneously requires to manage different instances of vcpkg.
In the course of this tutorial you will see that Conan can be used as a package manager for both pure Visual Studio and hybrid stacks. You will also see that when using Conan you don’t have to build from sources; you can also manage and share binaries for as many configurations as needed.
The main steps of this tutorial are:
- Clone and build an example “Hello World” Visual Studio project
- Create conan packages from the existing project
- Create multiple package binaries for different configurations
- Upload packages to your Conan server or JFrog Artifactory
- Reuse existing packages and binaries in a consumer Visual Studio project
- Create conan packages from the consumer project
A “Hello World” Visual Studio project
Start by cloning the existing example repository. It contains a simple “Hello World” library and the corresponding application:
$ git clone https://github.com/memsharded/hello_vs
$ cd hello_vs
It contains a src folder with the source code and a build folder with a Visual Studio 2015 solution containing 2 projects: a static library called “HelloLib” and an application called “Greet”. Open the Visual Studio solution:
$ build\HelloLib\HelloLib.sln
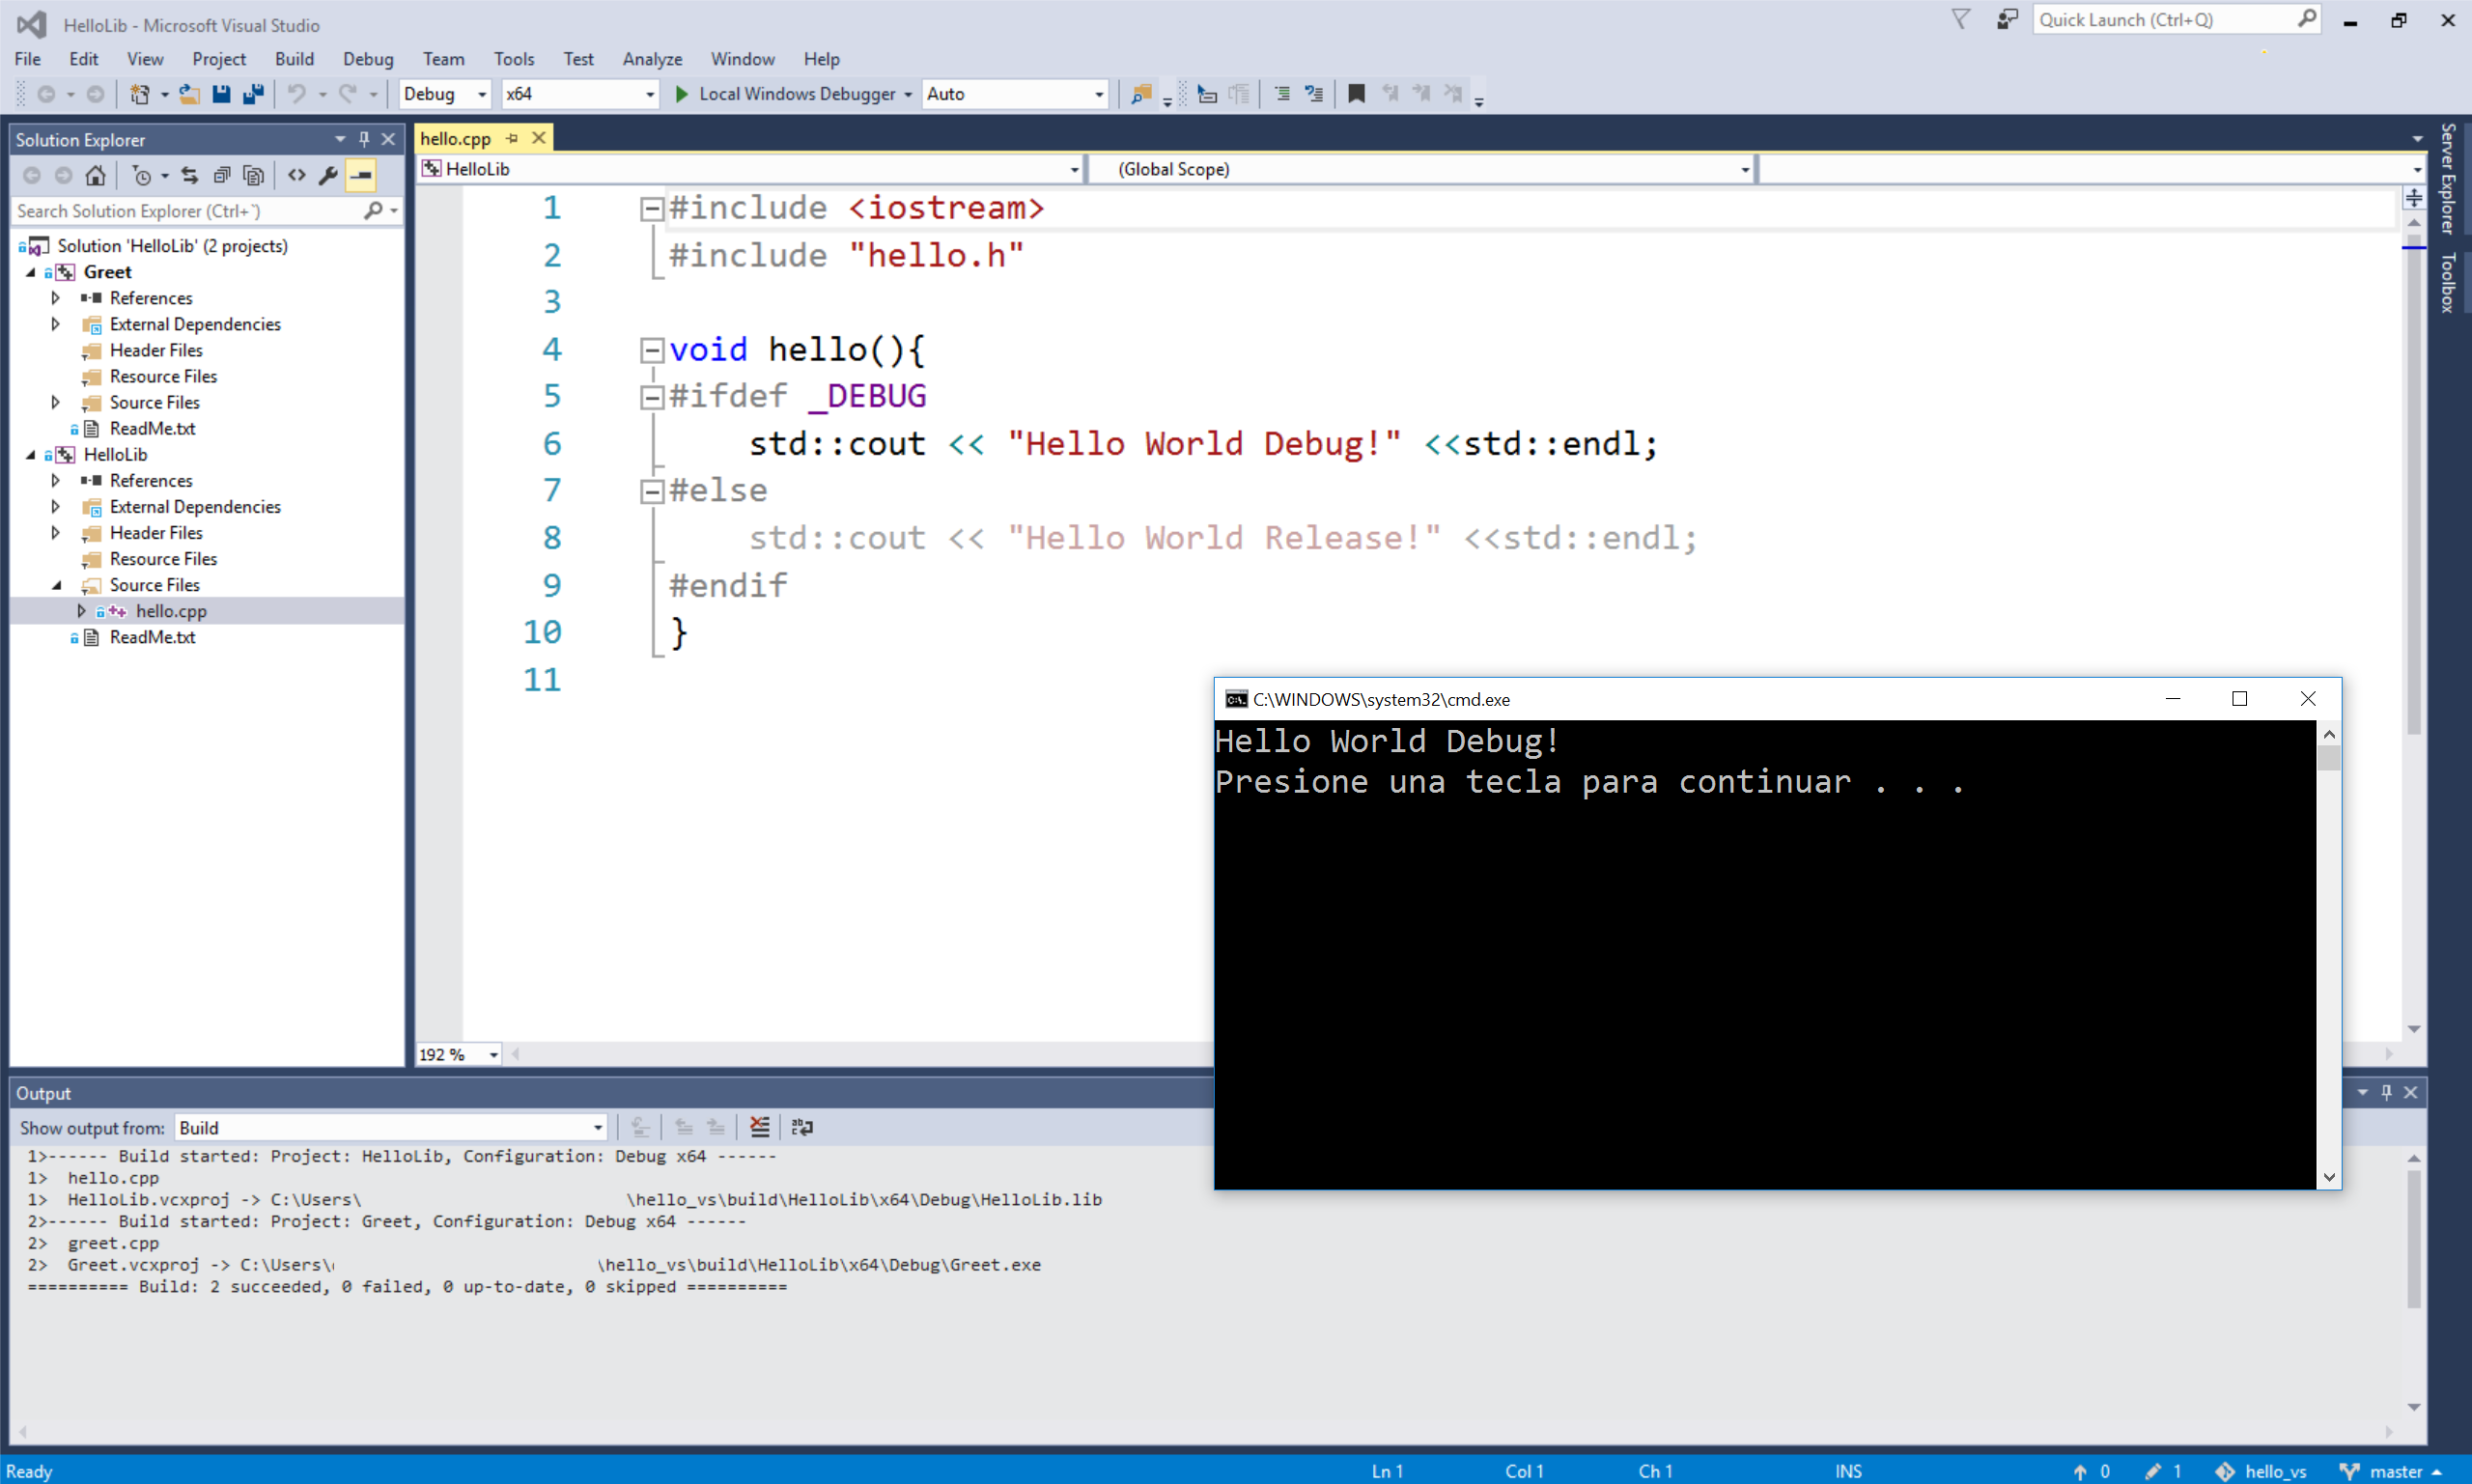
Set Greet as the startup project (Right-click Greet and select Set as Startup Project) Then build and run the app with Ctrl+F5. (Debug -> Start Without Debugging). Note that since the hello.cpp file contains an #ifdef _DEBUG to switch between debug and release messages, you can switch to Release mode and obtain a different output.
$ Hello World Debug!
# Switch IDE to Release mode, build and run again
$ Hello World Release!
Creating conan packages
The cloned repo already contains a Conan recipe:
class HelloConan(ConanFile):
    name = "Hello"
    version = "0.1"
    license = "MIT"
    url = "https://github.com/memsharded/hello_vs"
    settings = "os", "compiler", "build_type", "arch"
    exports_sources = "src/*", "build/*"

    def build(self):
        cmd = tools.msvc_build_command(self.settings, "build/HelloLib/HelloLib.sln")
        self.run(cmd)

    def package(self):
        self.copy("*.h", dst="include", src="src")
        self.copy("*.lib", dst="lib", keep_path=False)

    def package_info(self):
        self.cpp_info.libs = ["HelloLib"]
This recipe uses the msvc_build_command() function to get a command string containing the commands required to build the application with the correct configuration.
The recipe also contains a test_package folder with a simple example consuming application. In this example, the consuming application uses CMake to build, but it could also have used Visual Studio. We use CMake because it is the default generated with conan new, and to show that packages created from Visual Studio projects can also be consumed by other build systems such as CMake. This shows how Conan decouples the build system, which can help, for example, in a progressive migration to a new build system.
Now that we’re ready to create a package, we recommend closing the Visual Studio IDE, cleaning the temporary build files from Visual Studio to avoid problems, and then creating and testing the package (here it is using system defaults, assuming they are Visual Studio 14, Release, x86_64):
# close VS
$ git clean -xdf
$ conan test_package
...
> Hello World Release!
Instead of closing the IDE and running git clean, we could also configure a smarter filter in exports_sources field, so temporary build files are not exported into the recipe.
Creating different binaries for different configurations
This process can be repeated to create and test packages for different configurations:
$ conan test_package -s arch=x86
$ conan test_package -s compiler="Visual Studio" -s compiler.runtime=MDd -s build_type=Debug
$ conan test_package -s compiler="Visual Studio" -s compiler.runtime=MDd -s build_type=Debug -s arch=x86
You can list the different package binaries that were created:
$ conan search Hello/0.1@memsharded/testing
Uploading binaries
Once you have created a package locally, you can upload it to a Conan remote server. If you created it with the original username “memsharded”, as from the git clone, you might want to do a conan copy to put them on your own username. Of course, you can also edit the recipes or set the environment variable CONAN_USERNAME to define your own username.
Another alternative is to configure the permissions in the remote, to allow uploading packages with different usernames. Artifactory will allow it, but by default, conan_server doesn’t; permissions must be expressly provided in the [write_permissions] section of server.conf.
$ conan upload Hello/0.1@memsharded/testing --all -r=myserver
Reusing packages
To use existing packages directly from Visual Studio, Conan provides the visual_studio generator. Let’s clone an existing “Chat” project, consisting of a “ChatLib” static library that makes use of the previous “Hello World” package, and a “MyChat” application which calls the “ChatLib” library function.
$ git clone https://github.com/memsharded/chat_vs
$ cd chat_vs
As in the previous example, the repository contains a Visual Studio solution in the build folder. But if you try to open it, it will fail to load. This is because it expects to find a file with the required information about dependencies, so you first have to obtain that file . Just run:
$ conan install .
You will see that it created two files: a conaninfo.txt file containing the current configuration of dependencies, and a conanbuildinfo.props file containing the Visual Studio properties (such as <AdditionalIncludeDirectories>), so it is able to find the installed dependencies.
Now you can open the IDE and build and run the app (by the way, all the chat function does is call the hello() function two or three times depending on the build type):
$  build\ChatLib\ChatLib.sln
# Switch to Release
# MyChat -> Set as Startup Project
# Ctrl + F5 (Debug -> Run without debugging)
> Hello World Release!
> Hello World Release!
If you wish to link with the debug version of the Hello package, just install it and change the IDE build type:
$ conan install . -s build_type=Debug -s compiler="Visual Studio" -s compiler.runtime=MDd
# Switch to Debug
# Ctrl + F5 (Debug -> Run without debugging)
> Hello World Debug!
> Hello World Debug!
> Hello World Debug!
Creating packages from the consumer project
Now you can close the IDE and clean the temporary files:
# close VS IDE
$ git clean -xdf
Again, there is a conanfile.py package recipe in the repository together with a test_package. The recipe is almost identical to the previous one, but with two minor differences:
requires = "Hello/0.1@memsharded/testing"
...
generators = "visual_studio"
This will allow us to create and test the package of the “ChatLib” library:
$ conan test_package
...
> Hello World Release!
> Hello World Release!
You can also repeat the process for different build types and architectures, as above. The binary packages for the ChatLib library can also be uploaded and shared.
Other configurations
The above example works “as is” for VS2017, because VS supports upgrading from previous versions. The tools.msvc_build_command() already implements such functionality, so you can build and test packages with VS2017. The only requirement is to define the VS150COMNTOOLS environment variable because VS2017 doesn’t define it, and it is needed to find the tools:
# maybe better done system-wide after VS2017 installation
$ set VS150COMNTOOLS C:/Program Files (x86)/Microsoft Visual Studio/2017/Community/Common7/Tools
$ conan test_package -s compiler="Visual Studio" -s compiler.version=15
If needed, you can also build for older versions of Visual Studio. In that case, you would probably have different solution projects inside your build folder. Then’ the recipe only has to select the correct one, something like:
def build(self):
    # assuming HelloLibVS12, HelloLibVS14 subfolders
    sln_file = "build/HelloLibVS%s/HelloLib.sln" % self.settings.compiler.version
    cmd = tools.msvc_build_command(self.settings, sln_file)
    self.run(cmd)
Conclusions
First, a note. Currently, visual_studio is a single-configuration generator (i.e., packages contain either debug or release artifacts, the generally recommended approach). It does not support multi-config packages (i.e., those containing both debug and release artifacts). If you need this feature, please report and provide feedback by submitting an issue in github).
Microsoft Windows and Visual Studio have always been first class citizens in Conan. There are many OSS tools created mainly for “nix” like environments, and support for Windows comes later as an afterthought which sometimes requires inconvenient workarounds. While the Conan documentation and examples largely use CMake for convenience, it is not a requirement. This blog post shows that Conan can be used as a package manager for both pure Visual Studio and hybrid stacks that use other build systems. And not only building from sources, but also for managing and sharing binaries for as many configurations as needed in Conan remote servers (Artifactory or conan_server).
Any feedback? Please tell us in @conan_io or email: info@conan.io