Introducing the New Conan Visual Studio Extension Compatible with Conan 2


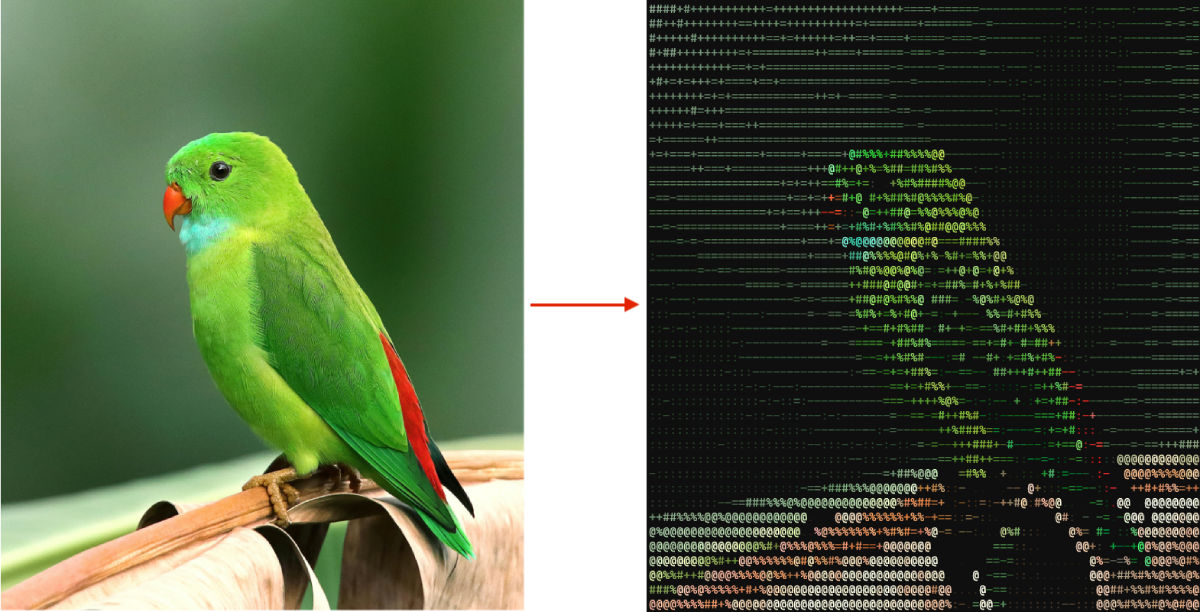
We’re excited to announce the release of the new Conan Extension for Visual Studio, now fully compatible with Conan 2. This extension is designed to simplify the workflow for developers using Visual Studio (2022 and later) and Conan for their C++ projects. This post will guide you through using the extension with a practical example: downloading an image from the internet, loading it, and displaying it as ASCII art in the console. For this purpose, we will use the following libraries, available in Conan Center:
- libcurl for downloading images from the Internet.
- stb for loading the downloaded images.
- fmt for printing the colored ASCII art output to the console.
Overview of the Extension
The Conan Extension for Visual Studio offers seamless integration for managing C++ packages within your IDE, eliminating the need for external configuration or terminal commands. Here’s how to get started:
Installation
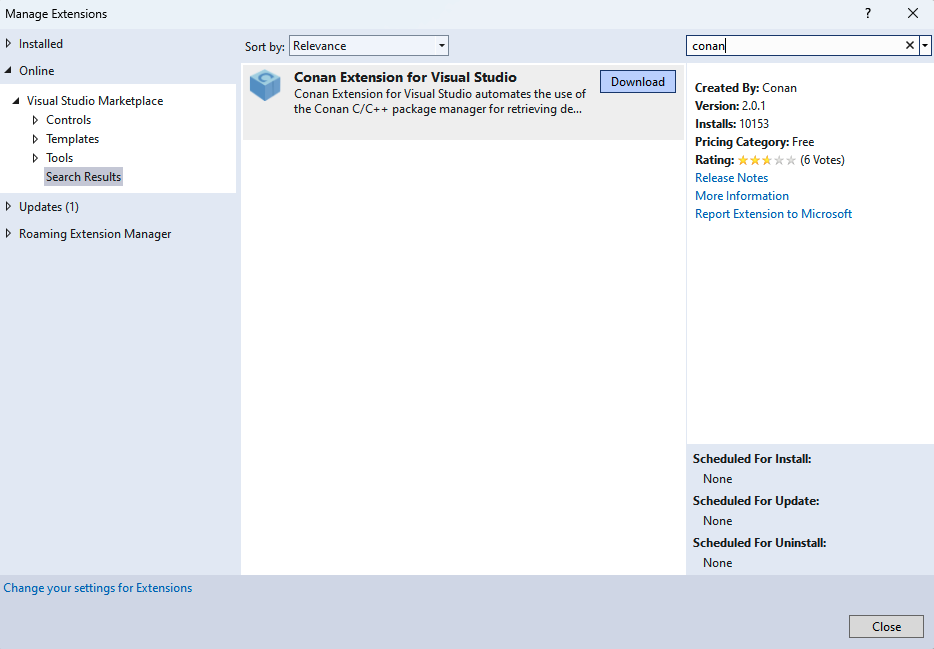
Install the Conan Extension directly within Visual Studio:
- Navigate to Extensions > Manage Extensions.
- Search for “Conan” in the Online marketplace.
- Click on the Download button and follow the installation prompts.
- Restart Visual Studio to activate the extension.
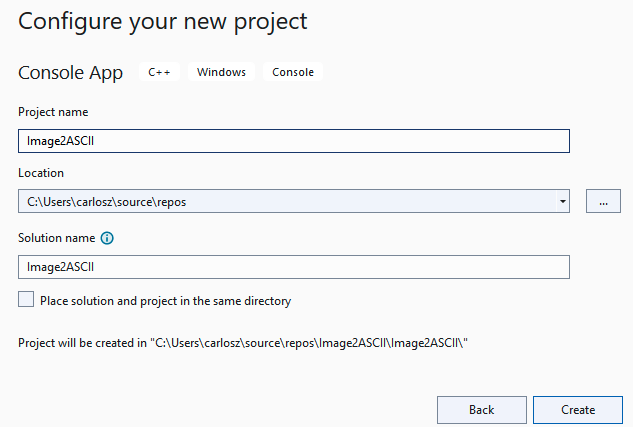
Creating a New C++ Project
With the Conan Extension installed, start by creating a new C++ project in Visual Studio. Let’s create a new C++ Console App project called Image2ASCII.
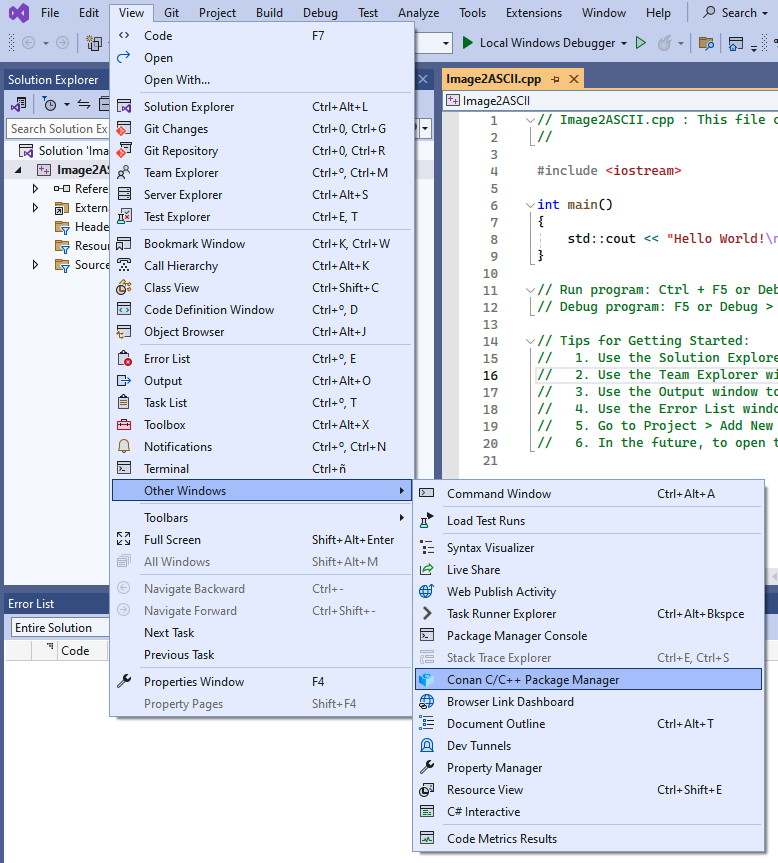
Configuring the Extension
First, start the extension by going to View > Other Windows > Conan C/C++ Package Manager and dock it in a place where you can easily access it, next to the Solution Explorer could be a good place.
Upon first use, configure the Conan executable path in the Conan tool window by clicking the ⚙️ (wheel) symbol. You can specify a custom path (for example, for a virtual environment) or use the system-wide installation.
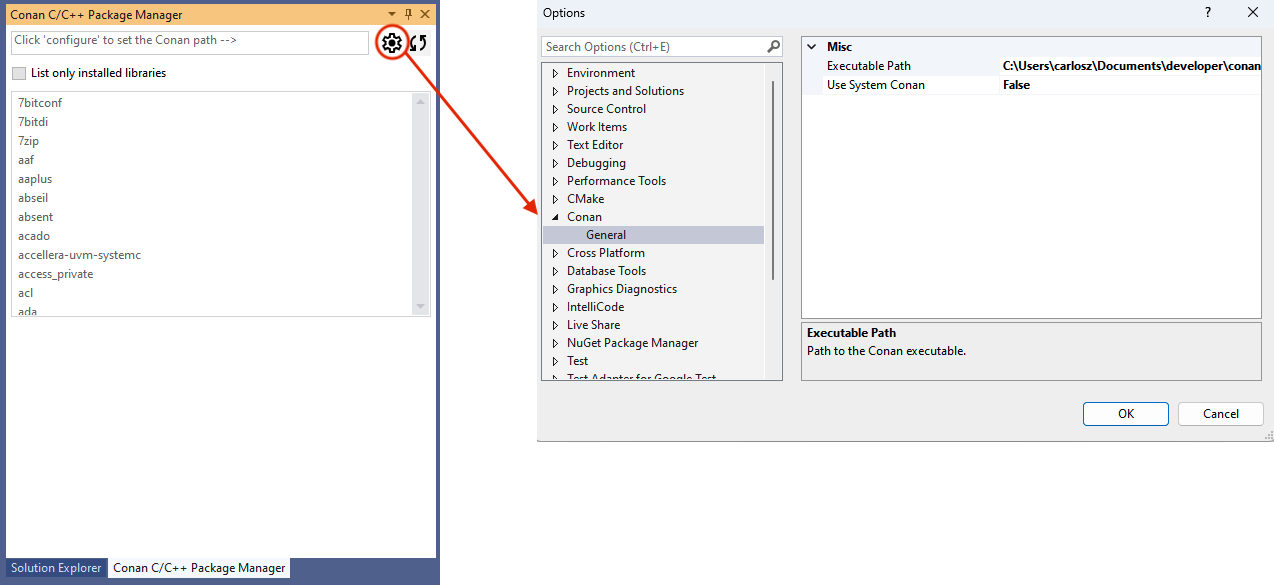
After setting a valid path for the Conan executable, the search box will be enabled, and we are ready to search for Conan packages to add them to our project.
Adding the Required Dependencies
Now let’s start adding the dependencies to the project and coding our ASCII Art generator.
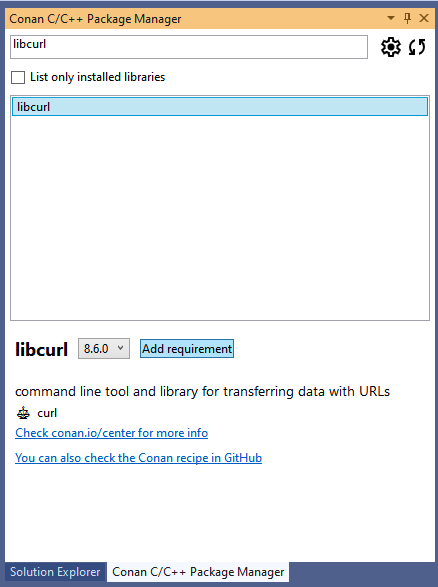
Please, first add the libcurl dependency for downloading images:
- Open the Conan tool window and search for
libcurl. - Select the desired version and click
Add requirementto include it in your project. - The extension automatically creates a
conanfile.pyandconandata.yml, to store the dependencies and to later invoke the MSBuildDeps generator before the build. - A prebuild event is added to your project settings, ensuring that the dependencies are installed prior to compilation.
Repeat the same steps for the stb and fmt libraries.
Adding the Code
Now we are ready to add the code for our ASCII art generator. We will not delve into the specific details of the code, as it is beyond the scope of this tutorial. However, all the source code for this example is available in the Conan 2.0 examples repo:
Open the Image2ASCII.cpp file that Visual Studio generated and replace the example code with the code below (you can also copy it from the repository):
#include <iostream>
#include <curl/curl.h>
#include <vector>
#include <string>
#include <fmt/core.h>
#include <fmt/color.h>

#define STB_IMAGE_IMPLEMENTATION
#include "stb_image.h"

// Size of ASCII art
static const int new_width = 80;

// Ascii gradient
static const std::string ASCII_CHARS = " .:-=+#%@@@";

// Function to scale the luminance into an ASCII character
char map_luminance_to_ascii(float luminance) {
    size_t position = luminance * (ASCII_CHARS.size() - 1);
    return ASCII_CHARS[position];
}

// Function to write data from curl call
static size_t write_data(void* ptr, size_t size, size_t nmemb, void* stream) {
    ((std::string*)stream)->append((char*)ptr, size * nmemb);
    return size * nmemb;
}

std::string download_image(const std::string& url) {
    CURL* curl = curl_easy_init();
    if (!curl) {
        std::cerr << "curl init failed" << std::endl;
        return "";
    }

    std::string response_string;
    curl_easy_setopt(curl, CURLOPT_URL, url.c_str());
    curl_easy_setopt(curl, CURLOPT_WRITEFUNCTION, write_data);
    curl_easy_setopt(curl, CURLOPT_WRITEDATA, &response_string);
    curl_easy_setopt(curl, CURLOPT_FOLLOWLOCATION, 1L); // Enable following redirection

    // Deactivate SSL verification, just for development!
    curl_easy_setopt(curl, CURLOPT_SSL_VERIFYPEER, 0L);
    curl_easy_setopt(curl, CURLOPT_SSL_VERIFYHOST, 0L);

    CURLcode res = curl_easy_perform(curl);
    if (res != CURLE_OK) {
        std::cerr << "curl_easy_perform() failed: " << curl_easy_strerror(res) << std::endl;
    }

    curl_easy_cleanup(curl);
    return response_string;
}

// Function to convert image to ASCII art
void image_to_ascii(const std::string& image_data) {
    int width, height, channels;
    unsigned char* data = stbi_load_from_memory(
        reinterpret_cast<const stbi_uc*>(image_data.data()),
        image_data.size(),
        &width,
        &height,
        &channels,
        0
    );

    if (data == nullptr) {
        std::cerr << "Error loading image" << std::endl;
        return;
    }

    // Adjust aspect ratio for ASCII art
    int new_height = static_cast<int>(static_cast<double>(height) / width * new_width * 0.45);

    for (int i = 0; i < new_height; ++i) {
        for (int j = 0; j < new_width; ++j) {
            int old_i = i * height / new_height;
            int old_j = j * width / new_width;

            float r = data[(old_i * width + old_j) * channels + 0] / 255.0f;
            float g = data[(old_i * width + old_j) * channels + 1] / 255.0f;
            float b = data[(old_i * width + old_j) * channels + 2] / 255.0f;
            float luminance = (0.2126f * r + 0.7152f * g + 0.0722f * b);

            char ascii_char = map_luminance_to_ascii(luminance);

            // Use fmt to print ASCII character with color
            fmt::print(fmt::fg(fmt::rgb(uint8_t(r * 255), uint8_t(g * 255), uint8_t(b * 255))), "{}", ascii_char);
        }
        fmt::print("\n");
    }

    stbi_image_free(data);
}

int main(int argc, char** argv) {
    // Picture by Roshan Kamath from pexels.com
    std::string url = "https://images.pexels.com/photos/1661179/pexels-photo-1661179.jpeg";

    if (argc > 1) {
        url = argv[1]; // Use provided URL if available
    }

    std::string image_data = download_image(url);
    image_to_ascii(image_data);

    return 0;
}
Essentially, this application accepts an image URL as an argument (or defaults to a
specific one if not provided) and downloads it using libcurl with the download_image()
function. Subsequently, it reads the RGB values with stb and converts the luminance
values to ASCII characters using the image_to_ascii() function, printing the colored
characters in the console using fmt.
Compilation and Execution
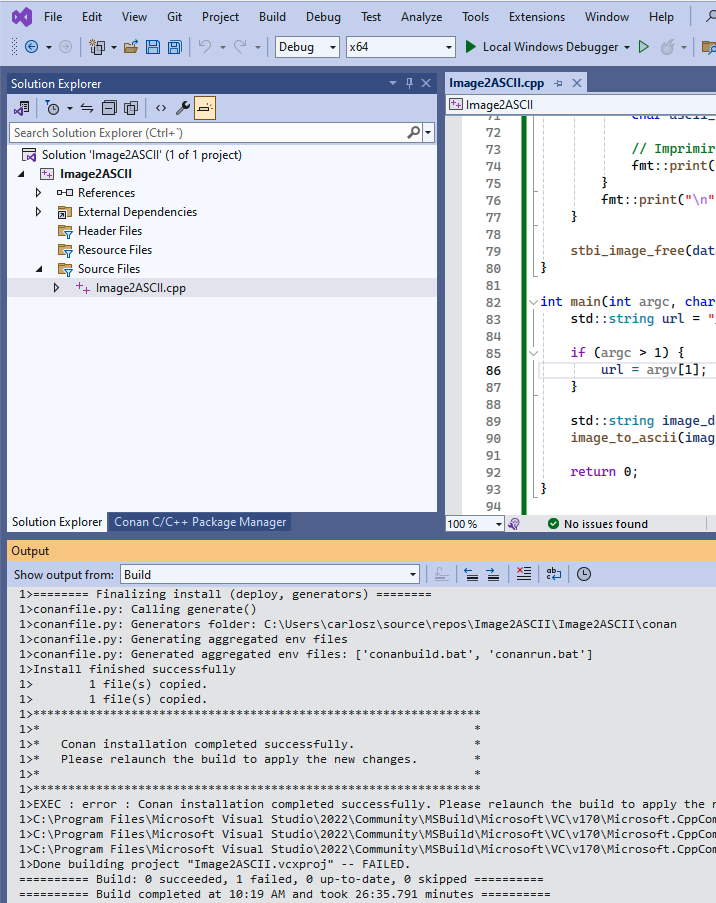
Build your project as usual in Visual Studio. The first build triggers the Conan installation for your dependencies. Every time you add a requirement or a requirement is not already installed for the selected configuration, the prebuild event will launch Conan to install the dependencies before building. After the first build of the project, once Conan has installed all the requirements, you will have to relaunch the build again so that all the properties with the packages’ locations are injected properly into the project.
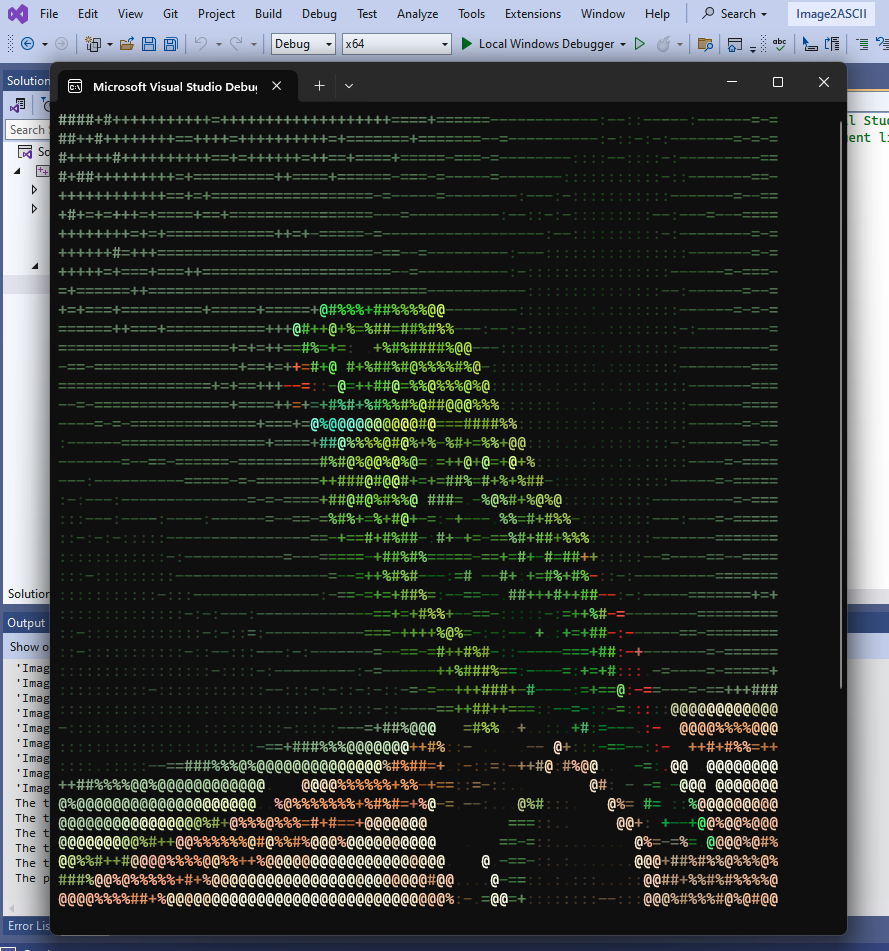
Now click on the run button to launch the program:
Conclusion
The new Conan Visual Studio extension, compatible with Conan 2, is designed to provide seamless integration between the Conan package manager and the Visual Studio IDE. By providing an integrated, intuitive interface, it eliminates the complexity of package management, allowing you to focus on developing your application. We hope this tool enhances your development experience, and we eagerly await to see what you will build with it!